Resources
The RYSI Award aims at kindling the inherent interest about science in children. While the award does not intend to restrict the exploration of the children to specific areas of science, the programme needs to focus on selected topics so as to have a theme as well as common evaluation parameters for the competition.
Here are a few sites that we recommend you explore to get an understanding of experiential science and a fascinating insight into several topics in Science:
Examples of Experiential Science
You will find below some examples of experiential science activities relating to the topics in the contest. The information has been curated from the resources above and contains links to our partner, ThinkTac, for your convenience.
Electrochemistry – DIY Battery
Resources
ThinkTac Guide
Watch Video on YouTube
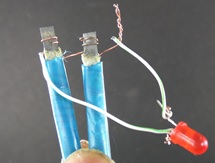

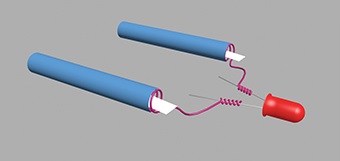
Description:The Voltaic cell was one of the first batteries to be invented and the principle behind its operation is still used in some modern batteries. A simple ‘wet’ cell consists of two metal plates, in this case magnesium and copper, separated by a liquid, in this case citric acid solution. Known as the electrolyte, this liquid serves as a channel for balancing the charge between the electrodes when the cell is being discharged. Here, we connect the “electrodes” (magnesium and copper strips) to an LED, which lights up after the cells are dipped in the electrolyte. This “battery” of two cells that you have just made, stays lit for hours, even after you remove it from the electrolyte. Once the electrolyte dries up, dip the cells in again, and the LED lights up once more! You may try using different electrolytes like salt water, vinegar, carbonated water or cold drinks, and see if these also light your LED. This model is also a simple and powerful demonstration for the difference in electronegativity of metals.
Material Used: copper strips, magnesium strips, filter paper, led, wire, tape, scissor, lemon/vinegar/citric acid
How to Make – Brief Instructions: Take the magnesium ribbon and cover it with a filter paper. Wrap this with a copper strip. You will now have one layer of copper and another of magnesium separated by the filter paper. Dip this in citric acid solution and your single cell is ready. Connect 2 cells in series to light up an LED.
Buy the Kit: You may buy a kit with material and guide from this link: Visit
website
Animal Organ System – Skeletal System – Ball Socket Joint
Resources
ThinkTac Guide
Watch Video on YouTube
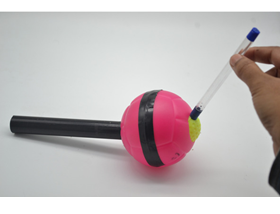
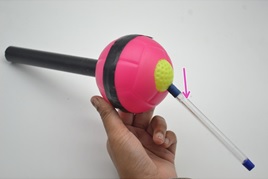
Description:If we look around we find joints all around us. Each type of joint has it’s own unique properties with different joints allowing different degrees of freedom which is crucial for the functionality of that joint. One of those unique joints in the human body is the ball-socket joint found in the shoulders as well as hip joint. Imagine how our life would have been different if the shoulder joint and hip joint had a hinge type of joint instead of ball-socket. As part of this activity we make the model of a ball-socket joint.
Material Used: plastic balls of two different sizes, pvc pipe, tape, scissor, paper cutter, pencil, candle, wire, glue
How to Make – Brief Instructions: Cut the bigger ball in the middle so that it can be opened enough to insert the smaller ball in. Now make holes on the opposite sides of the big ball. Insert and glue pvc pipe in one hole and insert the small ball in the big ball. Fix a pencil in the small ball. Now rotate the pencil and experience the ball-socket joint.
Buy the Kit:You may buy a kit with material and guide from this link: Visit website
Cells & Tissues – Microscope – Onion Cells
Resources
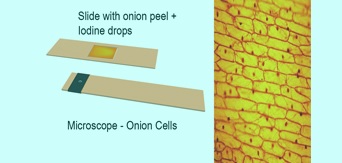
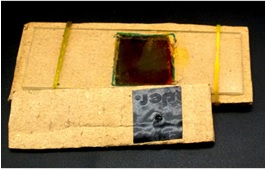
Description:The microscope is one of the most important scientific instruments ever made. Usually involving a pretty complicated optical set-up, with prohibitively expensive parts, most children rarely get to use one, let alone make one! Here, using a simple but high-quality transparent glass bead, we mount it on a piece of cardboard or wood to create a simple microscope, with nearly 100X magnification to view anything from leaves, thread fibres, pollen and fungi to smaller cells visible in onion peels or even cheek cells. Here, apart from the glass bead, we provide you with a glass slide and coverslips, with a staining agent, so that you may view onion cells through your own handmade microscope in all their glory. Can you identify the cell arrangement in the onion peel? What about identifying the nucleus of each onion cell?
Material Used:2.5 mm clear glass bead, wide ice cream stick, glass slide & coverslip, safranin solution, onion
How to Make – Brief Instructions:Make your own microscope using a 2.5 mm diameter clear glass bead. Prepare the slide of a thin layer of onion peel by placing it on given slide, staining it with safranin and placing the coverslip over it. Observe the cells and draw the structure as you see.
Buy the Kit: You may buy a kit with material and guide from this link: Visit website
Friction – Climbing Using Friction
Resources
Resources
ThinkTac Guide.
Watch Video on YouTube
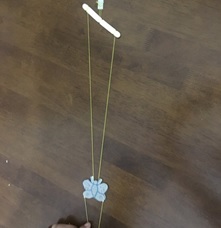
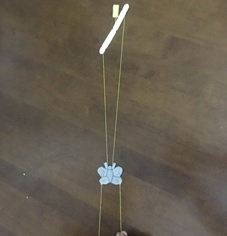
Description: When one has to climb a steep surface with nothing to hold on to we need to rely on the friction with the surface. For instance, to climb a tree without branches (like the coconut tree), humans use the friction on the tree’s surface and lift half body at a time. The lower half gets lifted when hands hold the tree and upper half gets lifted when feet hold the tree. In the above activity, the same phenomenon is demonstrated through a paper cut out of a butterfly which climbs using the friction between a thread and a slanted straw.
Material Used: Plastic straws, cotton thread, ice cream stick, cardsheet, beads, scissor, paper cutter, glue
How to Make – Brief Instructions: Glue two straw pieces between two card sheets. Glue them in a slanted manner so that they make an angle of 90 degree with each other. Pass a cotton thread through the straws and join the threads to make a loop. Now pull the threads one by one to make the card butterfly move forward/upward.
Rotation – Action Reaction
Resources
Detailed making guide
Watch Video on you tube
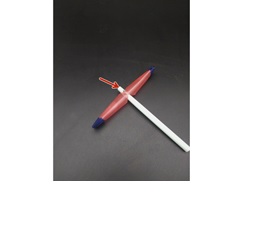
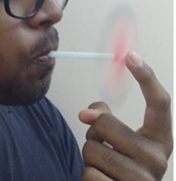
DescriptionWhen a boat reaches the bank and a person jumps out towards the bank, he/she pushes the boat away from the bank. In the same way when air comes out from one corner of a straw it pushes the straw in the opposite direction. Here is a simple toy made from two plastic straw pieces of different diameter demonstrating action reaction while we enjoy experiencing the spinning straw.
This toy is similar in operation to an ancient Greek steam engine called the Aeolipile. Though proposed much earlier, credit for building and refining the aeolipile goes to Heron of Alexandria, c. 10 A.D. Named after the Greek God of Air, it used expanding steam to induce motion.
Material Used: fat plastic straw, thin plastic straw, tape, scissor
How to Make – Brief Instructions: Take a fat straw piece and make a hole in the middle. Make the hole big enough to insert the thinner straw through it. Now flatten the fat straw such that you make 4 corners. Seal the corners using tape and cut open any two diagonally opposite corners. Make a small hole at one end of the thinner straw and insert this end of the thin straw into the middle hole of the fat straw. Cover the other end of the thin straw and blow through it. Enjoy seeing the fat straw spin.